Zigzagging With Yarn: The Highs and Lows of the Chevron Stitch
In our previous articles, we've looked at the importance of knitting increases and decreases for shaping garments. Now, we turn our attention to the Chevron stitch. This post will introduce three distinct approaches to this stitch, culminating in a comprehensive video tutorial that showcases our preferred technique.
What is the Chevron Stitch?
The Chevron Stitch is a striking knitting pattern characterised by its "V" shaped zigzag design and vertical ridges. It's easy construction makes it a popular choice for a variety of projects, from cosy blankets to stylish sweaters and scarves.
Crafting the Zigzag: How the Chevron Stitch is Formed
The magic of the Chevron Stitch lies in a combination of increases and decreases, which are strategically placed to create the peaks and valleys of the zigzag pattern.
- Increases (like yarn overs or make ones) push the stitches outwards and are used to create the upward peaks.
- Decreases (such as knit two together or slip, slip, knit) pull the stitches in and form the downward valleys.
- The pattern is repeated at regular intervals along rows and this builds the pattern.
- Alignment is key, ensuring the increases and decreases are aligned vertically so that the zigzags continue seamlessly across the fabric.
- Edges might include stitches in garter or stockinette stitch to prevent curling.
Why Choose the Chevron Stitch?
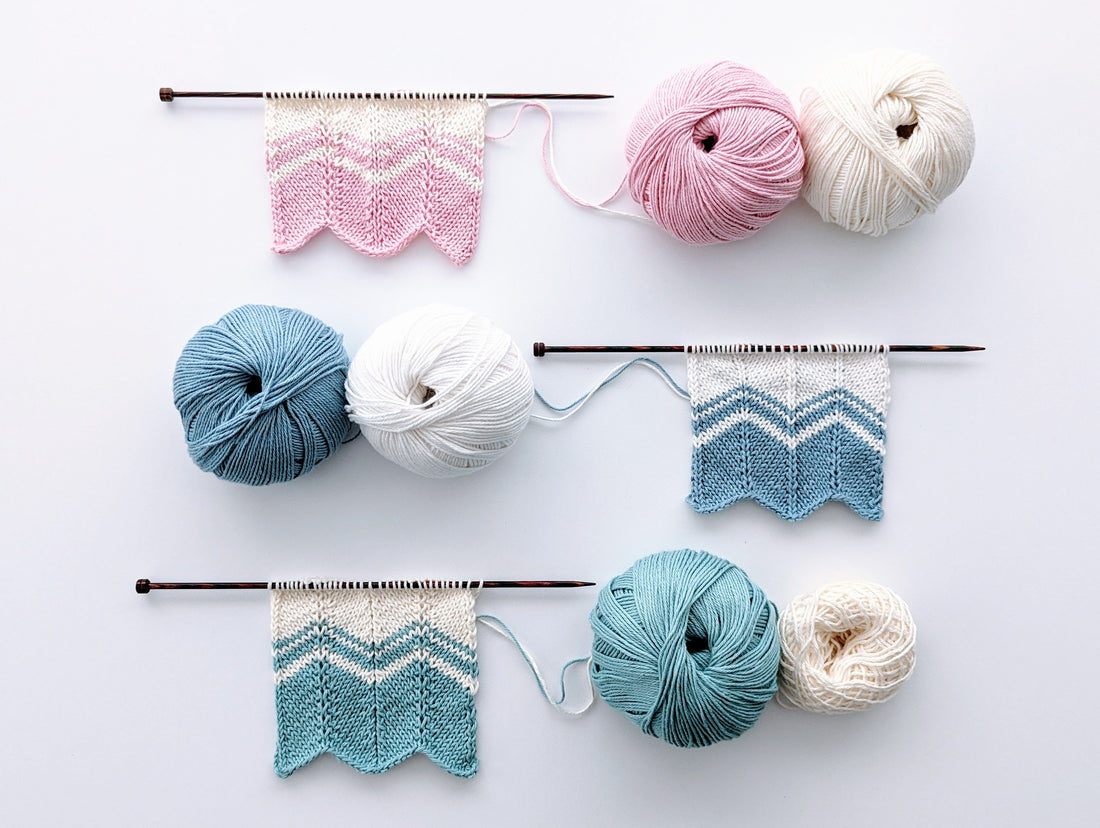
Visual Appeal - The Chevron Stitch is the perfect way to add patterning to your projects without the need for complicated stitches or colourwork. Using blocks of colour, whether thick, thin or a combination of both make the zig-zag pattern really stand out and can be a showcase for variegated yarns.
The stitches of this Chevron pattern appear to point diagonally left and right rather than the usual vertical columns we see in stockinette. But, despite the complicated appearance, it's surprisingly accessible even for those relatively new to knitting. It's an excellent way for beginners to level up their skills.
Which Increase and Decrease
In the samples below I trialled a selection of increases and decreases which offer different visual options for the peaks and valleys. All are viable options and there is no right or wrong stitch to use, this is all personal preference based on the effect you wish to create in the project.
Chevron Stitch Option 1

In this first version of the Chevron Stitch, the 'peaks' are formed using two KFB (Knit Front and Back) stitches placed next to each other.
The 'valleys' use a SSK and K2TOG place side-by-side.

The increases look elongated like slip stitches, creating a more open texture. When worked in stripes, the KFB horizontal stitches are more noticeable at the colour changes.
When placed together, the SSK and K2TOG decreases in the centre create a vertical 'seam' which works well in multiple colours.
Here's how we did it:
Abbreviations:
K ~ Knit
KFB ~ Knit into the front and back of the same stitch
K2TOG ~ Knit 2 stitches together
P ~ Purl
SSK ~ Slip, slip, knit
- Cast on 34 sts.
- K1, SSK, [K5, KFB, KFB, K5, SSK, K2TOG], K5, KFB, KFB, K5, K2TOG, K1.
- Purl.
- Repeat steps 2 and 3 as required.
Chevron Stitch Option 2

Here, M1R and M1L increases are utilised, separated by a k1. An extra stitch is also placed between the central K2TOG / SSK decreases. Adding this stitch between, creates a more gentle rather than pointed curve to the bottom edge and a more noticeable vertical column of stitches.

M1R and M1L create a neat increase, however there is a small horizontal bar, though this is barely visible. The k1 between makes for a nice vertical seam in the centre and these work well with stripes.
Abbreviations:
K ~ Knit
K2TOG ~ Knit 2 stitches together
M1L ~ Make 1 left
M1R ~ Make 1 right
P ~ Purl
SSK ~ Slip, slip, knit
- Cast on 33sts.
- K1, SSK, [K5, M1R, K1, M1L, K5, SSK, K1, K2TOG], K5, M1R, K1, M1L, K5, K2TOG, K1.
- Purl.
- Repeat steps 2 and 3 as required.
Chevron Stitch Option 3

In this final sample, the increases are created by closed yarnovers (YO) separated by a K1. Closed yarnovers result when the second stage of the YO, worked on the wrong side, twists the loop. To make this even neater, one of the yarnovers is worked backwards.
The central raised 'spine' of the decreases are created with a CDD (Central Double Decrease).

For me, this is my favourite method of increases and decreases. The YO holes are virtually invisible and the CDD creates a beautiful raised, vertical ridge. The colour changes are also wonderfully neat and line up perfectly.
Pattern
Below is the pattern and video for option 3 - our favourite version of the Chevron Stitch.
Abbreviations:
BYO ~ Backwards yarn over
CDD ~ Centred Double Decrease
K ~ Knit
K2TOG ~ Knit 2 stitches together
P ~ Purl
PTBL ~ Purl through the back loop
SSK ~ Slip, slip, knit
YO ~ Yarn over
- Cast on 35 sts.
- K1, SSK, [K6, BYO, K1, YO, K6, CDD], K6, BYO, K1, YO, K6, K2TOG, K1.
- P8, [P1TBL (through the yo), P1, P1 (through the byo), P13], P1TBL (through the yo), P1, P1 (through the byo), P8.
- Repeat steps 2 and 3 as required.
Options
- If you wish to create a larger piece, add multiples of 16 to your cast on and repeat the sections with the [] brackets above.
- For narrower or wider peaks and valleys, simply change the number of stitches between the increases and decreases i.e. the K6 values in step 2. Remember to change the associated purl values on the wrong side row.
- For a more decorative, simply use the standard YO for the increases and purl as normal on the wrong side, i.e not through the back loop. This will create eyelets on either side of the vertical 'peak' column.
In Conclusion
The Chevron Stitch is more than just a knitting pattern. It's a stitch that encourages you to play with colour, texture and design. Whether you're a seasoned knitter or just starting, the Chevron Stitch is a delightful challenge that rewards you with stunning results. So, why not pick up those needles and give these 3 options a try and see which is your favourite?
Happy Knitting 🧶
